Adventuring in Nilgiris – Birdspotting
I was an “Adventure Intern” at NALS, Coonoor – so were the wife, kid and the dog. That meant we got to spend time living and walking around in a tea estate and the jungle surrounding it for a month.
We had a morning off one day and I went around with my camera trying to spot and take pictures of birds. These are a few thoughts that might help you if you ever find yourself in a similar situation.
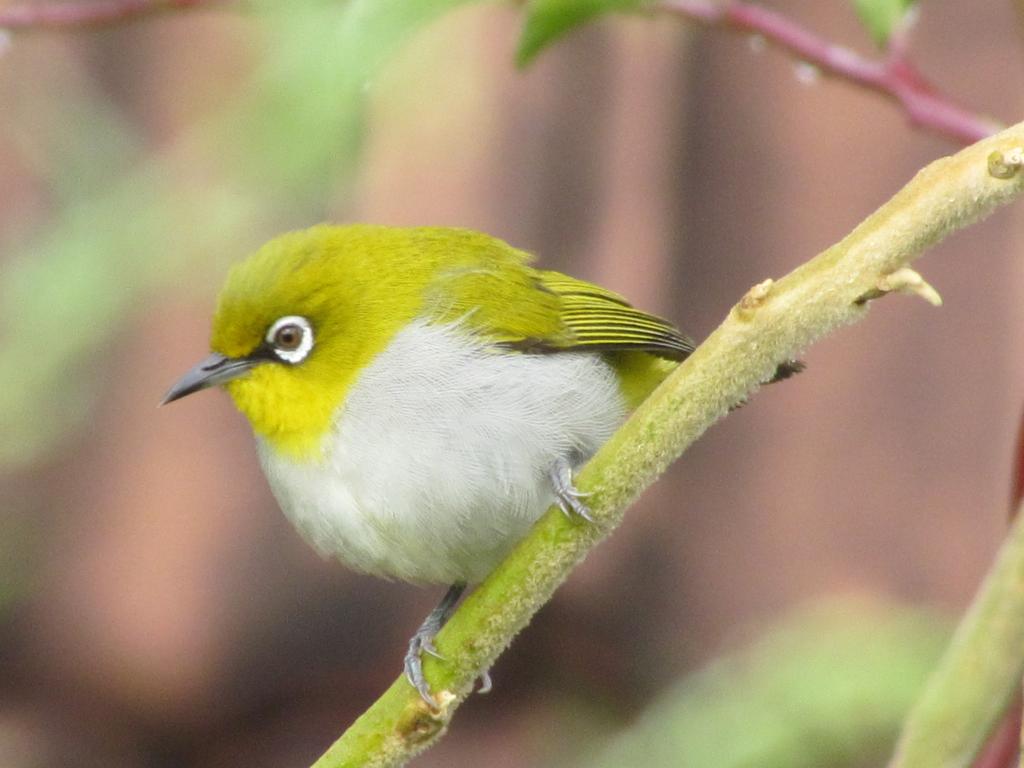
Before we go further, here is a sample picture of what I later found to be an oriental white eye.

You may think it would be easy to take bird pictures – just take your camera, go to the place from where you hear the birds and click away. In practice, if you just keep walking, you never reach the place where birds are chirping. After a while, you realize that you are moving within a sphere of silence. You can always hear the birds chirping, a little behind and a little ahead of you. You spot birds from a distance but you are never close enough to take a picture (unless you have like a 100x camera or something).
The trick is to spot the birds that interest you and note the bushes where you see them. Typically these are some kind of flowering bushes with fruits as well. Now sit or stand slightly far from the place. Just stand there – don’t walk around or make a noise. You don’t need to stand like a statue – you can shift weight from foot to foot and turn around to watch stuff. Just don’t move too much.
Another thing while choosing the place – the sun should be behind you. Else, you will end up getting silhouette pictures.
You will now find the chirping slowly getting nearer as the birds get accustomed to your presence and start moving about, coming near and making sounds. Typically this happens when you stand around long enough for the local flies, mosquitoes and gnats to find you and start irritating you.
First, the boldest birds come back – in my case, it was red vented bulbuls. Then slowly, the other birds return and the bird you really want to take a picture of will come last. In this case at least, it is true that all things come to those who wait.
Once you spot a bird, you will note that they rarely stand still for a pose. Birds move constantly but once they are near a food source, they move in short bursts and move only a very short distance. Identify the general area in which the bird is moving, zoom in and follow the movement of the branches. You will eventually figure out the rhythm.
Initially, shoot everything that moves – slowly you can start ignoring the ones you have covered. As a matter of fact, I found afterwards that two sun birds I thought were the same were actually two different types!
A few other notes:
- Lot of patience and a little luck are what you need.
- Murphy’s Law works like everywhere else – you see the best possible shots when you are the least prepared. The auto zoom camera you are using decides to switch off seconds before you see the shot.
- It helps if you have a hiking stick or something to rest your hand on when you are taking the shot – else you will end up with blurry pictures
- Birds generally have a fall back position to quickly hide when someone is approaching. This is typically a little less visible than the feeding area. If you find that position and have a good zoom camera, you could get really good pictures
The approach above will help you cover the common types of sunbirds, bulbuls, barbets etc. For more exotic birds like woodpeckers and hoopoes, note the general area you spot them in and go back frequently. You could get lucky!
Do let me know your thoughts and any other inputs you may have, in the comments.